Showing posts with label Recipes. Show all posts

Sunday, March 17, 2013

Pistachio Cake

 
We had an extended family party yesterday, with a St. Patrick's Day theme.
I made this Pistachio Cake for dessert.
 
This cake is so yummy!
It's dense & moist~ almost like a banana bread texture.
Even my pickiest eater liked it, which is saying a lot!
 
Pistachio Cake
 
1 package yellow cake mix
2 small packages pistachio instant pudding mix
4 eggs
1 cup Sprite
1/2 cup oil
1 cup chopped walnuts
1 cup cold whipping cream
3/4 cup cold milk
2 tsp. powdered sugar
 
Preheat oven to 350. In a large bowl, combine the cake mix, ONE pudding mix, eggs, Sprite and oil.
Beat on low speed for 30 seconds. Beat on medium speed for 2 minutes.
Stir in 1/2 cup walnuts. Pout batter into a greased and floured 10-inch Bundt pan.
Bake for 40-45 minutes.
Cool for 10 minutes before removing from pan to a wire rack to cool completely.
When cake is cool, place the cream, milk, ONE pudding mix and powdered sugar in a large bowl.
Beat on high until stiff peaks form. Frost cake, then sprinkle with 1/2 cup walnuts. Keep refrigerated.
 
*My Notes:
I just stirred the nuts in the frosting, rather than sprinkling on top.
This can also be made in a 9x13 pan.


Tuesday, October 23, 2012

Absolutley Amazing Lasagna

This is my favorite lasagna recipe.
It is incredibly yummy!
 
 
Amazing Lasagna
 
 
1 pound ground beef
6 ounces ground pork (not sausage, see notes)
3/4 cup chopped onion
1 clove garlic, minced
 
1 can (1 pound) tomatoes
1 can (15 ounces) tomato sauce
2 Tbs. parsley flakes
2 Tbs. sugar
1 tsp. salt
1 tsp.  basil leaves
 
24 ounces cottage cheese
1/2 cup grated Parmesan cheese
1 Tbs. parsley flakes
1 1/2 tsp. salt
1 tsp. oregano leaves
 
12 lasagna noodles, cooked & well drained
3/4 pound mozzarella cheese, shredded
1/2 pound cheddar cheese, shredded
1/2 cup grated Parmesan cheese
 
Cook and stir ground beef, ground pork, onion & garlic in large saucepan until meat is brown and onion is tender. Drain off all grease.
 
Add tomatoes, break up with a fork if necessary. Stir in tomato sauce, 2 Tbs. parsley flakes, the sugar, 1 tsp. salt and the basil. Heat to boiling, stirring occasionally. Reduce heat; simmer uncovered 1 hour or until mixture is the consistency of spaghetti sauce.
 
Heat oven to 350 degrees. Mix cottage cheese, 1/2 cup Parmesan cheese, 1 Tbs. parsley flakes, 1 1/2 tsp. salt and the oregano. Reserve 1/2 cup meat sauce for thin top layer.
 
In un-greased 9x13 pan, layer 1/4 each of the noodles, meat sauce, mozzarella cheese, cheddar cheese and cottage cheese mixture. Repeat the layers 3 times.
 
Spread reserved meat sauce over top, sprinkle with 1/2 cup Parmesan cheese.
(Lasagna can be covered and refrigerated several hours at this point if desired. Add an additional 10-15 minutes to cook time)
Bake uncovered for 45 minutes
For easier cutting, let stand 15 minutes after removing from oven.
 
Yield: 12 servings
 
*My Notes:
Ground pork can be a little difficult to find. You can substitute a mild sausage if you have to. Try a mild Italian sausage, or a mild country sausage.
 
The cheddar cheese is my addition. We just like it with just a little bit of cheddar!
 
I use pre-grated Parmesan, I've found a brand I like. When I first started making this, I used the Kraft powdered stuff, 'cause I didn't know there was any different kind. You can use whichever you prefer.
 
The simmer time of the meat sauce will depend on what type of tomatoes you use. I usually use either petite diced or crushed style of tomatoes.
 
Start to finish takes about 2 hours. Approximately 1 hour prep/assembly & 1 hour baking time.


Thursday, September 13, 2012

Delicious Apple Crisp

My mom has been making this yummy Apple Crisp for as long as I can remember.
She got the recipe from a newspaper clipping & I've only seen one other similar recipe.
This Crisp recipe does not have oatmeal, but does have a yummy, crunchy topping.
In addition to being yummy, it is also super easy to throw together.


Apple Crisp
 
4 cups apples, pared and sliced (4-5 medium apples)
1 tsp. cinnamon
1/4 tsp. nutmeg
1/2 cup water
1 tsp. lemon juice
1 cup sugar
3/4 cup flour
1/3 cup butter, softened to room temperature
 
Place sliced apples in a buttered casserole dish or 9x13 pan (glass is best).
Sprinkle with spices.
Combine water and lemon juice and pour over the top.
Work together the flour, sugar and butter until it resembles coarse crumbs.
(You can use a pastry cutter, a mixer, or just do it by hand)
Spread evenly over the apples.
Do not cover.
Bake @ 350 until apples are tender
Approx. 45 minutes to 1 hour.
 
My notes:
*Use a good baking apple!
And there are lots of differing opinions on this!
 Try Granny Smith, McIntosh, Roman Beauty, Cortland or Gala apples.
*Use a potato peeler to peel the apples. It is so much easier than peeling with a knife. This is my new favorite cooking tip...thank you Internet!
*I always just combine the crisp part by hand. This is one of the first things I remember my mom teaching me to make. :)


Monday, June 4, 2012

Eclair Cake


This is a favorite dessert around here.
It's one of those recipes that is super easy, but has a great "Wow" factor.
Makes an elegant dessert for Bridal or Baby Showers or other special events.

My recipe is a combination of 2 similar recipes, one from my recipe guru, Sharla; and one from  Amy.

Eclair Cake

Crust:

1 1/2 cubes margarine or butter
1 1/2 cups flour
1 1/2 cups water
6 large eggs

In a medium saucepan, combine margarine and water and bring to a boil. Remove from heat and mix in flour. Allow mixture to cool in pan for 10 minutes. In a separate bowl, whip 6 eggs until well blended. Pour eggs over mixture in saucepan. Use a hand mixer to combine mixture until it has a smooth consistency and appears glossy. Spread into a greased jelly roll pan (12x17) with a rubber spatula. Bake at 400 degrees for 25-30 minutes. Cool completely. (I make the crust the night before)
Crust will puff up, but flattens as it cools.

Topping:

8 oz. package cream cheese
3 TBS. milk
2 small packages vanilla instant pudding mix
3 cups milk
16 oz carton Cool Whip
Chocolate Syrup

Beat cream cheese and 3 TBS milk until smooth.
Beat vanilla instant pudding mix with 3 cups of milk. When thick, mix with cream cheese mixture.
Fold in Cool Whip.
Spread on cooled crust, leaving a little of the edge showing.
Drizzle with chocolate syrup.
Refrigerate at least 1 hour before serving.
Cut into squares to serve.
Makes about 24 large squares


Wednesday, January 18, 2012

Hamburger Soup

I used to make this soup all the time when my kids were younger, but I  hadn't made it for a while.
It's easy and yummy!
 I had forgotten how much we like it!
It is very similar to Connie's Vegetable Soup.
The recipe is from one of my favorite cookbooks:
"Managing Your Meals" by Winnifred Jardine


Hamburger Vegetable  Soup
1 pound lean ground beef
2 onions, chopped
4 cups water
1 can (28 ounces) tomatoes (I like petite diced) or 1 qrt. bottled tomatoes
5 medium potatoes, pared & cubed
3 large carrots, peeled & sliced or cubed
1 tsp. salt
1 bay leaf
2 cups Monterey Jack cheese, cubed

In a large pan, brown ground beef with onion.
Add remaining ingredients, except the cheese.
Simmer, partially covered, until vegetables are tender, about 1 hour.
Just before serving, garnish with cheese cubes.
Makes 8 servings.

Hope you enjoy!


Wednesday, May 25, 2011

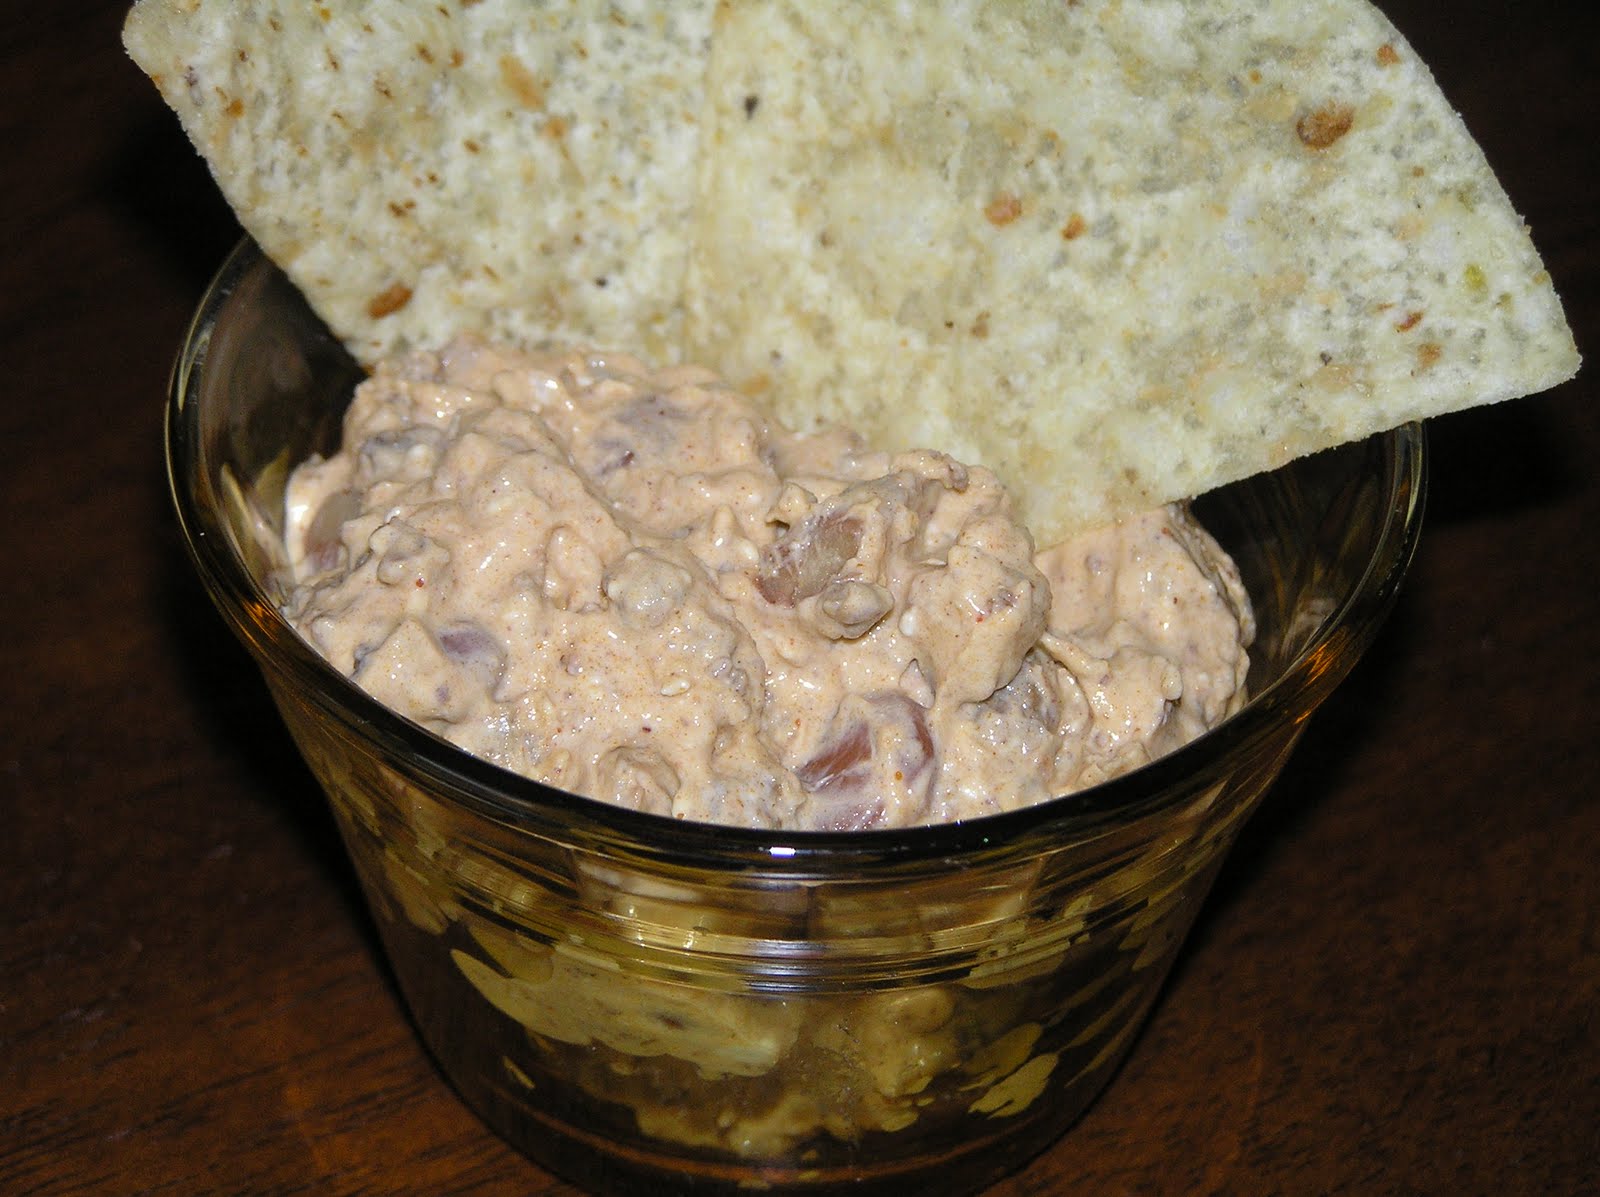
Walla-Walla Chili Dip


This is such an easy recipe~ but it has a great YUM factor!
I haven't made this for a while, so we had all forgotten how much we like it!
I got this recipe from Amy a few years ago. While we were in Arizona, I could never find the chili there, so she would always send me back with a few cans whenever we visited Utah.

Walla Walla Onion Chili Dip

1-15 oz. can Nalley's Walla-Walla Onion Chili w/ Beans
1-8 oz. pkg. Cream Cheese

Combine ingredients over medium heat until cheese is melted.
Serve warm with tortilla chips.
(It's also good cold)

I'm linking up here today:

GBPRecipeRoundUp

Wednesday, May 11, 2011

Chicken Taco Pasta Salad

I think it's high time for a recipe!
This is hands-down my most requested recipe.
This recipe is also from my friend, Sharla. She got it from her mother-in-law.
My kids complain that I never make this for our family. I always make it for something else & they get to enjoy the leftovers! :)


Chicken Taco Pasta Salad
by Charlene Butler

1-12 oz pkg. tri-colored Rotini pasta
3-4 chicken breasts
1 pkg. taco seasoning mix
1 can kidney beans-drained
1 can garbanzo beans-drained
1 pkg. frozen petite corn
2 cans sliced olives, drained
1 onion, finely diced
1 green pepper-chopped
tomatoes-chopped
grated cheese
taco chips


Dressing: (Best if made the night before)
2 cups mayonnaise, 1 cup buttermilk, 1 pkg. Hidden Valley Fiesta
Dip Mix (if you can't find this, use regular Ranch dressing mix and
1/2 a package taco seasoning mix).
Mix together and refrigerate until ready to use.
(I prefer the taco seasoning mix/ranch dressing mix combination)

Cook pasta according to package directions. Drain and cool. Cut
chicken into bite size pieces. Brown in small amount of oil. When
chicken is cooked, add taco seasoning mix and 1/4 cup water. Simmer
about 5 minutes. Drain and cool. Cook corn in small amount of
water. Do not overcook, it should still be slightly crisp. Drain and cool.

In large mixing bowl, combine pasta, chicken, beans, onion, green pepper,
corn, olives and tomatoes.

Mix with dressing.
Place salad in bowl. Arrange chips around edge of
salad. Garnish with grated cheese, chopped tomatoes and olives.

Served Additional chips and grated cheese on the side.

(Tripled serves 50+ as a side)

My notes:
*I just boil the chicken…then simmer in the taco seasoning. Or, you can throw the chicken, taco seasoning and water in the crock pot and cook it that way too.
*I always serve the grated cheese on the side as it has a tendency to get soggy in the salad.
*Sometimes I leave out the tomatoes, or the peppers...you can adjust to your families tastes.
*Please, please, please use frozen petite corn. And don't overcook it!


Friday, February 25, 2011

Cookies, Sugar!

 Finally!!!!
Yes~ I finally made Sugar Cookies...
I haven't made sugar cookies for a very, very long time. And I've been intending to do it for a while now, but it just never seems to happen.
I decided that no matter what, I was going to make Amy's Sugar Cookies this year for Valentines.
No. Matter. What!


 And honestly? It wasn't nearly as messy and terrible as I remembered.
Messy? Yes...but not so bad.
Perhaps that was because the kids didn't help?
They just stood around, confused, jaws hanging open...

Next time~ I'll get them to help!


 This is a soft sugar cookie recipe~ the kind with sour cream in it.
They were good. Nice and soft...uh except for the first batch, which I over baked. They still got eaten, though!
I do think this particular recipe is better with frosting.
You may remember that my kids don't like frosting?
I left the cookies all un-frosted, so everyone could choose if they wanted frosting or not.
And guess what??? My kids liked them with the frosting too!

In fact, Shane ate an un-frosted cookie and spit it out in the garbage!
He did not like it at all. I had to coax him to try another one with frosting.
He liked the frosted ones much better!

Absolutely my favorite buttercream type (un-cooked) frosting right now!
Light, fluffy and not too overly sweet.
(I wish she were still blogging! Check out some of her other yummy recipes too. The Sugar Cookie bars are also yummy!)

When I was making the frosting, I remembered my mom teaching me to make buttercream frosting.
She would tell me, "Don't drown the miller". That's what she called it if I added too much liquid.  Which I did on frequent occasions!


Amy's Soft Sugar Cookies

In large bowl or mixer, Mix together:
1/2 cup margarine
2 cups sugar
2 eggs
2 tsp. vanilla
1 cup sour cream (small container)

In a separate bowl, mix together: then add to previous ingredients:
1 tsp. salt
2 tsp. soda
61/2-7 cups flour

Roll out to desired thickness. (I like mine thick!)
Bake for 5-8 minutes (mine were perfect @ 6 minutes)
 @ 400 degrees on greased cookie sheet.
Cool on rack
Frost, if desired
 I recommend:

And this is what happens when you put 2 frosted cookies on a plate to take pictures for your blog.
And then you try to tip the plate for a more pleasing photography angle...

SPLAT!

 Good thing I waited to mop the floor until after I was done baking cookies!


I have another recipe I'll be trying... sometime...soonish...
Do you have a favorite sugar cookie recipe?

Monday, January 24, 2011

Chocolate Chip Cookie...Cupcakes!

I made these cupcakes last week.
I saw the recipe a while back at Kevin and Amanda and knew I wanted to try them!


The recipe is pretty easy.

Most of my cupcakes turned out pretty good:


But a few turned out like this:
I'm not an accomplished enough baker to know why. Altitude perhaps?
No worries, I had plenty that did turn out!
And...just like my last cupcake experiment~ I had lots of cake batter left over. Really...lots! 

 (I have a few pictures that look like a freaky alien face~ I left those out!)

I found a few of these...frosting caps?
My family obviously does not like frosting.
Poor topless cupcakes!


The cupcakes tasted really good. Be warned~ they are pretty rich!
I made them for an object lesson for our Family Home Evening last week.
(Feasting on the Scriptures/Hidden Treasures)

Here's what we liked even better than the cupcakes...
The leftover cookie dough! The recipe contains no eggs, so it is safe to eat.
I kept some in the fridge and I froze some. I really liked the frozen ones!


 I have another recipe for "raw" cookie dough that I am going to try this week.
I'll let you know how they turn out & which recipe we like best.

(P.S. Two basketball games down with no embarrassing incidents! Things are looking up!)

Friday, December 10, 2010

Cookie Exchange

Are you all ready for Christmas?
I'm not...haven't even started yet! WHAT???  I know, I know.
Haven't even gotten the tree decorated yet! It is up~ and has lights, but that is as far as we've gotten.
I am trying really hard to not be stressed out about all the "stuff".  And just taking things one day at a time.
Hopefully all the Merry Decor will be festively flung this weekend.

Last night, we had our neighborhood Cookie Exchange. Thanks to my brave neighbor, Heidi~ who hosts this every year.
Since I have lots of chocolate left-overs from the wedding, I decided to make something that would use some of that: Oreo Truffles.

 I use Bakerella's recipe. You can find it here: Bakerella's Oreo Truffles
They turned out pretty well. They were ugly (I'm still working on my rolling and dipping technique) but they were good! Everyone was impressed. I was less than happy with the chocolate, though. It has good flavor~ but wasn't quite the same as the molding/dipping chocolate I usually use. It didn't set up very quickly, and it has a thinner consistency than the other stuff. And I still have a whole lot of chocolate left. Maybe I'll melt it down and pour it into my candy molds~ then it will be easier to eat!

Hope everyone is having a wonderful December.
 Merry Christmas from our family to yours.

Tuesday, November 30, 2010

Thanksgiving Bloopers

Things were going well enough until:


Oh yes, I did! And trust me, it's not that easy to do, either! I had 10 or so of these banners I was making. Obviously they weren't as easy to throw together as I had anticipated.

And then there was this:

What is it? Well, a perfectly set, Jell-O Salad.  Why would I consider this a "blooper"?
Well, Jell-O and I do not get along. (click the link to read more) I think this is the first Jell-O I have ever made that actually turned out. And, it was good! Trust me, I'd already started writing the blog post about the failed Jell-O attempt. That's how confident I was that it wouldn't turn out!  It's Jell-O, people! With stuff in it! These kinds of recipes never work out for me...and I mean Never. So, I'm sure it was a lucky fluke for me.
And, I have to admit that even though I was proud of myself...part of me was secretly disappointed because the epic failure was going to make such a great blog post!

Plus, now what am I supposed to do? Can I still call myself a Jell-O making failure?

Find the recipe here:

Oh, and P.S. I forgot to add..."I got the laryngitis"! What is it with me and being sick for the Holidays? This means we won't be sick for Christmas, though. Right? Right???

Monday, November 22, 2010

Candy Corn Cupcakes~Recipe Review

A couple of months ago, I saw a recipe for Candy Corn Twist Cupcakes in LHJ. I thought they looked pretty cool...but perhaps a little above my skill level!

Later, I was looking online for the recipe, and found these Candy Corn Cupcakes at Our Best Bites. On the same post, there is also a great video tutorial on frosting cupcakes! Bonus!!!


This was my first attempt at piping the frosting on, and I think they look fabulous! But we'll talk more about the frosting in a minute...

First, let's talk about the cake. I used the doctored up cake-mix recipe that is posted on the blog. I used vanilla instead of almond flavoring, because that was all I had.

I also couldn't find the right food coloring colors. Who knew every single store in UT County would be out of yellow and orange?  You'd think it was Halloween, or something! I ended up getting colors that were close...Buttercup Yellow and Copper. 


This is the batter after I have divided it and added the food coloring.  At this point I am getting a little worried. The batter is pretty thick. Mine actually was kind of a yucky, pasty consistency. And I had quite a bit more batter than the recipe said I would end up with...
And Buttercup Yellow and Copper turned out looking a lot like Fry Sauce and Mustard! I figured if the cupcakes didn't turn out as Candy Corns, maybe I could do some sort of Condiment Cupcake. :) I'm sure that would be a big hit!

Okay, so I have more batter than I was expecting, and it has an odd consistency and a slightly unappetizing color.  No matter, I just forged on ahead!  The next issue I ran in to was when I put the batter in the cupcake liners and then tapped (pounded?) the cupcake pan on the counter to spread the batter. The batter just sat there in a glob. I had to wet the tip of my finger and spread it out to the sides.  The good news is, they did bake up rather nicely. I easily got 24 cupcakes and still had enough batter to make maybe 3-4 more cupcakes. What I was short on, was patience, so the rest of the batter went down the sink. Next time, I think I'll use just a tiny bit more batter for each cupcake.

The cupcakes looked pretty~ and despite the coloring flaw, they did look like candy corns.  But I did not like the cake itself.  The cupcakes were very dry and lacked flavor. Pretty much like eating a dry sponge. Now, I will try this recipe again~ because it does get rave reviews.  I'm not sure what went wrong, so hopefully it was just a one time thing. 

But now...let's talk about the frosting, shall we? 
First, let's get the failure out of the way!
I used the Perfect Cupcake Frosting and Filling that was recommended in the recipe. I read through the recipe very carefully, and paid close attention to all the pictures. I also read the comments so I could get a good feel for the recipe, as I have never made a cooked frosting before. (But there are recipes similar to this one pretty much everywhere right now, so I wanted to give it a try).

One hint I read was to make sure you cook the frosting long enough.  Some people were having less than desirable results by not cooking the flour and milk to the proper stage/consistency.
I am happy to report I did not have this problem.


Just the opposite, in fact! I cooked mine a little too long. Just know that when the flour/milk mixture starts to thicken, it gets real thick, real fast! So I am including some helpful photos of what the frosting should NOT look like at this stage!  Consistency of mashed potatoes=bad.  Okay?  Okay.


See, I can't even get it to go through my mesh strainer! Fail!!! Dump it down the sink, run to the computer, look up Tasty Kitchen where you know you've seen a similar recipe...and attempt that one instead!
I used the "That's the Best Frosting I've Ever Had" recipe, which is similar to the first one, but without the whole pesky straining it through a strainer step.  I also read Ree's Tutorial; "That's Still the Best Frosting I've Ever Had"! Just to make sure I had all my bases covered.


A couple tips: Don't overcook (already covered that one!)
The recipe states that the sugar and butter should be beaten/whipped whatever until it is no longer grainy. Well...I beat mine for about 12 minutes and it still had a slightly grainy texture. But once I added the flour/milk mixture and beat it all together, it was just fine. Actually, more than fine...absolutely heavenly.
And then...there's the whole cooling the milk/flour. I used the cooling method from the first recipe, because it seemed easier. DO NOT put this in the fridge to cool!!! Because if you do, you will have a nice, thick skin that will form on the top...which you will notice at exactly the same time that you stir it up a bit. It will be all lumpy and yucky. Then you will want to cry a little, because you don't want to have to start over AGAIN!!!
Do cool it in the ice water in the sink.  (Don't worry, those pesky little lumps beat right out when I combined all the ingredients). Just remember...whip the heck out of it and all will be right with the world. This really is a fabulous frosting!  I like frosting, the rest of my family merely tolerate it. Can you believe no one ate any of the cupcakes?  They wouldn't even try the frosting!!! Don't worry, I'll keep making it~ they're bound to try it eventually! Meantime...all the more frosting for me!!!!

The Verdict:
Rainbow Method: Very easy to do, with a high "wow" factor. Win/Win!
Cake: Bleh. Dry and flavorless. I will try it again though.
Frosting: To. Die For! I might have licked the spoon, and the whisk...and the bowl.  Who am I kidding? I ate 2 spoonfuls of frosting when no one was looking!

Friday, November 19, 2010

Halloween, Part II...Finally

Let's get this wrapped up, shall we?

Friday night was "Party Central". Spencer went to a party at a friend's house. He was a punk rocker, complete with tattoo sleeves, piercings, and guy liner. And an angry face!

 Em and her friends had a party here at our house. They dressed up as "Peace", "Love", and "Happiness". They had fun making their costumes, and I thought it was a pretty creative idea.

Shane as a Dark Ninja.  A wet, Dark Ninja!  It was so rainy and cold, and he was not too thrilled with the idea of going out Trick-or-Treating.

Shane with the rest of the neighborhood boys. Aka, the "Boo Crew".

On Sunday, we had a family dinner and I made Mummy Meatloaf...this was kind of a pain in the butt to make! The meatloaf part was easy, but it took me much longer than I had anticipated to cover the face with noodles! The picture looks a lot better than it did in real life!

And Mashed Potato Ghosts...Let me just say, I love potatoes.  They are my ultimate comfort food! I have been wanting to try Pioneer Woman's Delicious, Creamy Mashed Potatoes and decided this was the perfect time. I loved these potatoes! So yummy...I was hoping my family would gush over them too...but I guess no one else loves potatoes as much as I do! They said they were "good" and "fine", and "okay". I was hoping for more along the lines of "out of this world!" or "Please, never make any potatoes but these!" I guess I'll settle for "good".  I'm not too sure my family is very impressed with all my culinary experimenting.
 I just threw the potatoes in a disposable Wilton piping bag, snipped off the end and made round, ghostly mounds of potatoes. I piped them on a cookie sheet and then popped them in the oven for a few minutes to warm them up just before serving. Have I mentioned how yummy they were?  I've yet to meet a PW recipe that hasn't been super yummy! I wonder if her family thinks her cooking is "good"?  :)

And for dessert, there were these: Candy Corn Cupcakes.  These are my first attempt (well, at least for a very long time) at making and decorating cupcakes. So I am ecstatic that they turned out as nice as they did! They are gonna have their very own post! 

Thursday, October 28, 2010

Pumpkin Spice Cake


I was trying to be creative with the photography...which led to Emily mocking me! 
I'm unappreciated in my family, I tell ya!  They did like the cake though~ that's the perk for them when I blog!

Pumpkin Spice Cake
Spice Cake Mix (dry)
1 3/4 cup pumpkin (1-15 oz can)
1 small vanilla instant pudding (dry)
1/2 cup oil
3 eggs
1/2 tsp. pumpkin pie spice

Mix together well.  Pour into a greased,  9x13 cake pan. (Batter will be thick).  Bake as directed on cake mix box.  Cool completely, frost with cream cheese frosting.

Cream Cheese Frosting
1-8 oz pkg. cream cheese, softened
1/2 cup butter (one stick)
1 tsp. vanilla
1 lb. powdered sugar

Combine ingredients and frost cooled cake.

*My notes:
My family aren't real frosting lovers, so I used just slightly more than 1/2 of the frosting. 
The rest of it I'll probably just eat with a spoon! :)


Thursday, September 9, 2010

My Current Cooking Quest

I am currently on a quest to find my favorite dinner rolls recipe.

These are not them (those?).
These are, however, my favorite "in-a-pinch-forgot-to-make-rolls-and-dinner-is-in-an-hour" rolls.
Which is pretty much all the time (that I forget to start the rolls).

I'm sending you here to find the recipe:

These rolls are pretty darn good.  My family likes them, and they are easy to throw together.
My favorite shape for rolls right now is the Rosette (pictured above).
You can find out how to make them here:

And while you are at it, go ahead and check out this roll recipe, which is my current favorite:

I have a few other recipes to try, and I will also be revisting the famed Lion House Rolls recipe.  When I made them, they were kinda "blah", so I do need to give them another go around!

Since I seem to be in a linky mood tonight
(Not to be confused with loopy)
Here is a link to some other fun ways to shape rolls. 

Do you have a favorite roll recipe you want to share? 

Friday, August 13, 2010

Amy's Yummy Breadsticks

Oh my, these are so yummy!  I've made them about 4 times in the last couple of weeks. 


1 1/2 cups warm water
1/4 tsp salt
1 Tbs. yeast
2 Tbs. sugar
3 1/2 cups flour

Layer ingredients in bread machine in the order listed. Set on dough setting.  (I don't have a bread machine, I just throw all the ingredients in my Kitchen Aid and mix them up until the dough forms a ball, sort of, and is smooth and elastic)
When complete, spread in greased cookie sheet and slice lines.  Let rise while mixing topping.
(I let them rise about 15 minutes or so)

Topping
1/4 cup melted butter
1/3 cup Parmesan cheese (I use the real stuff)
1/4 tsp parsley flakes
1/4 cup mayonnaise
1/2 tsp. garlic salt

Mix well and spread over dough.
Bake at 350 for 20-25 minutes until golden brown.

My notes:
Dough is on the sticky side. Wetting your hands will help you spread the dough easier.
I use a little bit smaller cookie sheet rather than my big sheet cake pans. 
I haven't tried these with the powdered Parmesan (you know, in the green bottle) but I think it would probably work okay too.
Don't be afraid of the mayonnaise...and DO NOT use Miracle Whip...just sayin'.
For a short cut, you could use the topping and spread on slices of French Bread. 
Did I mention these are really, really yummy? 


Monday, August 9, 2010

Blond Toffee Brownies


I've been on somewhat of a baking kick lately.
Not that anyone is complaining. 
Well, maybe just a little because baking you know, heats up the house & it's summer and all...
But other than that, yeah no complaining. 

Perhaps the baking binge is because I recently acquired this:


Oooh, baby! I have been coveting   wanting one of these for a long, long time!
When we moved back to Utah...we were over at Amy & Gary's and I noticed she had a Kitchen Aid. 
I actually said to Rick; "When did Amy get a Kitchen Aid?  No Fair!".  I was J-E-A-L-O-U-S!!! 
I got over it...really, I did! 
But...on Mother's Day this year, Rick and Emily had a huge surprise for me! 
I cried when I unwrapped it!  It was awesome!!!
Then I got sick before I could even use it...so now I guess I'm trying to catch up!!! 
And I have been putting it to good use, that's for sure.

Now, for the recipe (finally).
I used to make these years ago, but had forgotten about them...A while back I remembered that I used to have a toffee brownie recipe...but I couldn't find it anywhere.  I was pretty sure I had gotten the recipe off of a package of toffee bits...but search as I might, I couldn't find it.
Then, just a few days ago...I remembered that the recipe was from a magazine! Aren't our brains wonderful?  I went searching through my collection of cooking magazines and there it was!!! I knew it was the right recipe because I had written some notes on it. 
Okay, so NOW, here is the recipe (gees, get to the recipe already, would ya?)

Blond Toffee Brownies

1/2 cup butter or margarine, softened
1 cup sugar
1/2 cup packed brown sugar
2 eggs
1 tsp. vanilla extract
1 1/2 cups flour
2 tsps. baking powder
1/4 tsp. salt
1 cup English Toffee bits

In a mixing bowl, cream butter and sugars.  Add eggs, one at a time, beating well after each addition.  Beat in vanilla.  Combine the flour, baking powder and salt; gradually add to creamed mixture. Stir in toffee bits.
Batter will be thick. Spread evenly into a greased 9x13x2 in baking pan.  Bake at 350 for 35-40 minutes or until a toothpick inserted near the center comes out clean.  Cool. Cut into bars to serve.

My notes:
The bars are thin, which is probably good because they are very rich!  The toffee melts, so they are also pretty gooey...Next time I make them, I'm going to use the toffee bits that have the chocolate.  Shane told me these are really good, but he thinks they need just a little chocolate. 

Thursday, July 29, 2010

Fajita Nachos


When we lived in Arizona, we loved to get Fajita Nachos at Abuelo's Restaurant.  YUMMY!!!
They are pretty easy to recreate at home.

Tostada Shells
Cooked, Shredded meat (beef, chicken or pork)
Diced Onion
Diced Green Chilies
Shredded Cheese
Sour Cream
Optional Toppings: Sliced Jalapenos, Guacamole, Olives, Pica de Gallo

Coat baking sheet with cooking spray.  Arrange tostada shells on baking sheet and top with meat, onions, green chilies and shredded cheese.
Bake @350 degrees for 10 minutes or until cheese is melted and toppings are heated through.
Serve topped with sour cream and other toppings of your choice. 


My notes: These are really, really good made with leftover Kalua Pork. 
Or with this Pulled Pork.  (My family didn't care for the pulled pork, but it was indescribably good on the nachos!)
These are super easy to throw together if you have leftover meat from another meal. 

We had a little Kalua Pork left over from a recent family event.  Curtis received the
It was a great day!!!